Hyper-V
Installing Hyper-V on Windows 11
Enabling Hyper-V on Windows 11 to install a Windows 11 VM
If you use a Windows 11 PC, you might assume installing Hyper-V would be sufficient. However, since you're reading this, it implies you possess some knowledge about computers and Microsoft, rendering the question rhetorical.
If you have come across this page due to a message in your virtual machine (VM) stating,
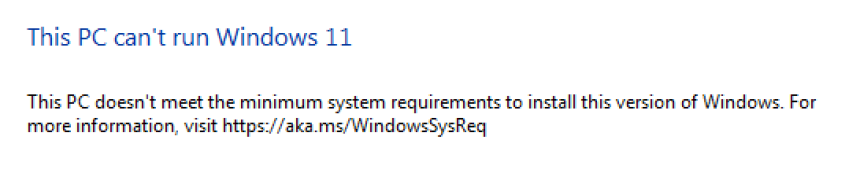
"This PC can't run Windows 11"
"This PC doesn't meet the minimum system requirements to install this version of Windows. For more information, visit https://aka.ms/WindowsSysReq,"
then hopefully, following the below instructions will answer your queries.
To resolve the issue, it is essential to note that the Windows 11 VM exclusively functions on Generation 2, which employs UEFI-based firmware. If you set your VM up on Generation 1, it will never surpass the "This PC can't run Windows 11". If that snippet of information has resolved your problem, we appreciate your visit. Feel free to leave a comment, and remember to bookmark this page before you depart.

Still here?
Before proceeding, please note that this process will require a few restarts. Therefore, it is crucial to save and close all your work.
The minimum requirements
1. You need Windows 11 Pro and above (There is a way to do this with scripts for the Home version, but I have never tried it)
2. 64-bit processor with second-level address translation SLAT
3. Minimum of 4GB of RAM is available for the VM. so you need 8GB on the main system at least
4. Virtualisation support enabled in the BIOS
Run (Windows key + R) “msinfo32” or (Windows Key + R, then type CMD and enter) CMD “systeminfo” to quickly check above
Turn on virtualisation on UEFI on the Host PC
- Click the windows ico or keyboard Windows Key, and click on the Settings icon or Run “ms-settings:” – Don’t forget the colon
- Click System (default typically) and then “Recovery” It's one of the boxes, just scroll down a bit.
- Click the “Restart Now” button ..NOT NOW. You need to read the rest first. Print it or take a photo with your phone etc!
- When the computer restarts, it will come up with what we used to call the Safe Mode, the Recovery options. Click on the box that says “Troubleshoot” and then “Advanced Options” and finally the “UEFI Firmware Settings” then Restart.
- Once in the BIOS area you are looking for anything with the wording ‘Virtualisation Technology” or “SVM” when you find it, enable it.
- Save F10, then normally Save and Exit
Back in Windows, we install the Hyper-V feature
- Run appwiz.cpl and choose “Turn Windows features on or off” on the left side of the Programs and Features window.
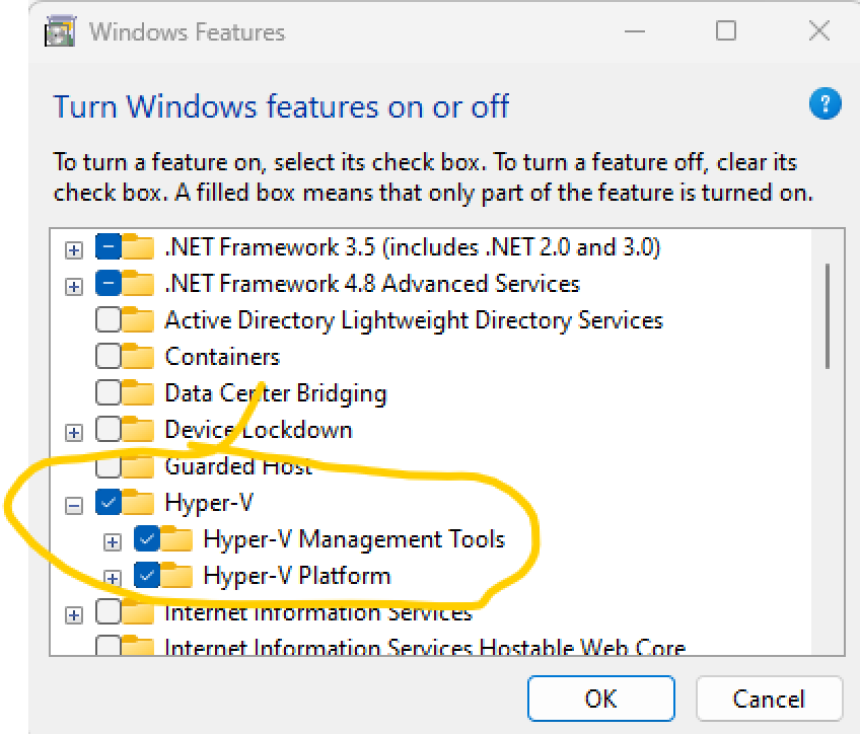
- Tick the Hyper-V option and drill down, ticking all the boxes so you have a tick and not a minus sign – see the picture circled in yellow.
- Click OK, wait and restart accordingly.
You can now build your VM, ensuring to tick the Generation 2 option, allocating at least 4096MB of memory and other settings as required.
Once installed, go to the settings of the VM and click Security. Tick the box marked “Enable Trusted Platform Module” and apply. Check that at least 2 Virtual processors have been allocated under the Processor option.
If you still encounter the "This PC can't run Windows 11" error, there is one final option. While in the Win11 setup window within the VM, wait until the error message appears, and then press "Shift + F10" to open the command window. Paste the following command – If you can’t paste into the VM, then select the Clipboard tab (top of the VM window) and select “Type Clipboard Text Ctrl+V”
REG ADD HKLM\SYSTEM\Setup\LabConfig /v BypassTPMCheck /t REG_DWORD /d 1
Press Enter to execute the command.
Next, click the options button to return to the previous page (indicated by the back arrow at the top left of the window). Proceed with the version selection process as usual, keeping your fingers crossed that you can agree to the license and leave the problem behind.
If you have any further comments, leaving them here will increase the visibility of this page in search engine rankings, ensuring it remains accessible when you need to recall the steps for your next PC setup.