
Lua script for the Thranda Cessna 208 on Xplane 12
Version 2.0 (this will be updated as I add to the project)
Welcome to the beginner's guide on integrating LUA scripts with X-Plane 12! If you've been tirelessly searching how to implement latching toggle switches in X-Plane, breathe easy - you're in the right place. Not only is it possible, but it's also more straightforward than you might think.
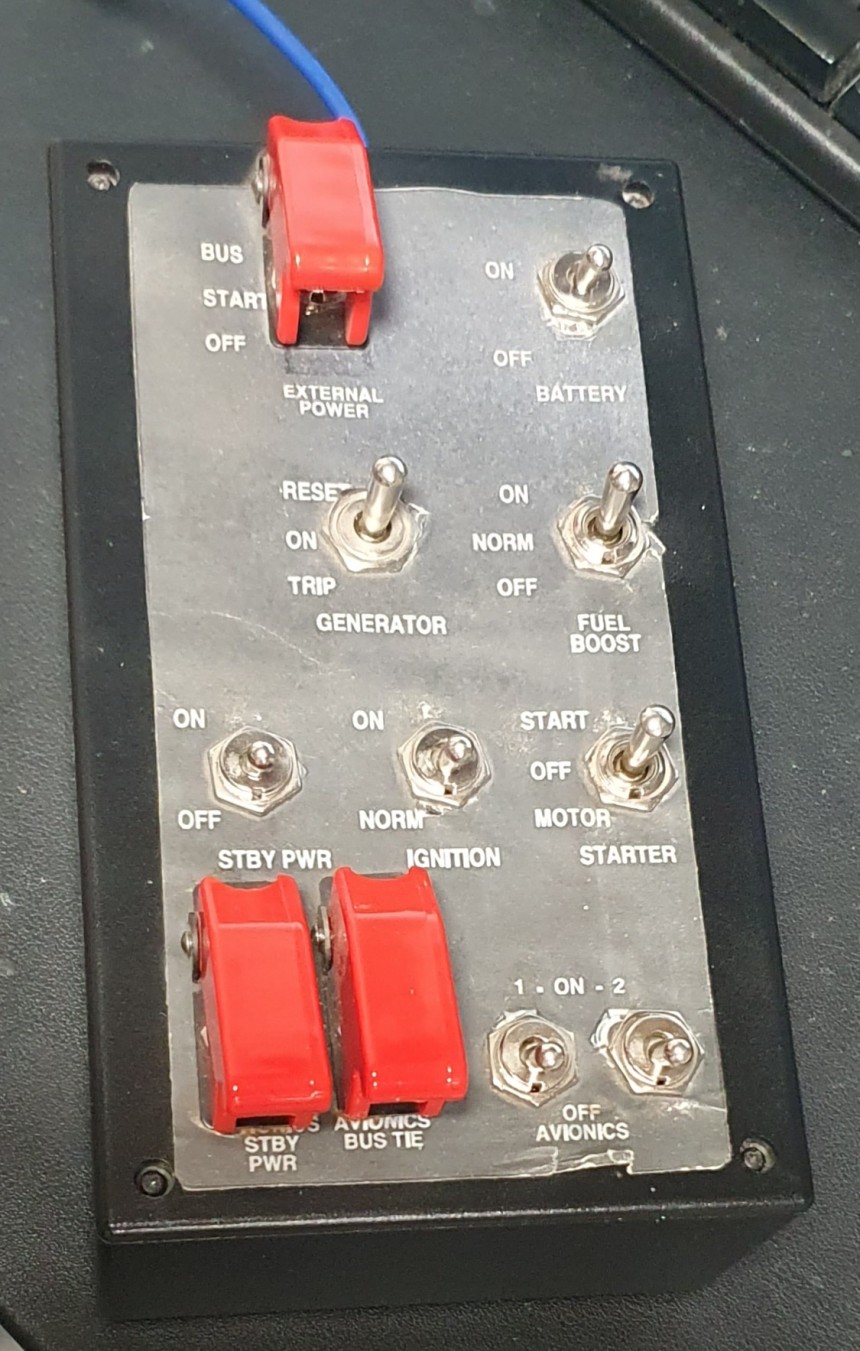
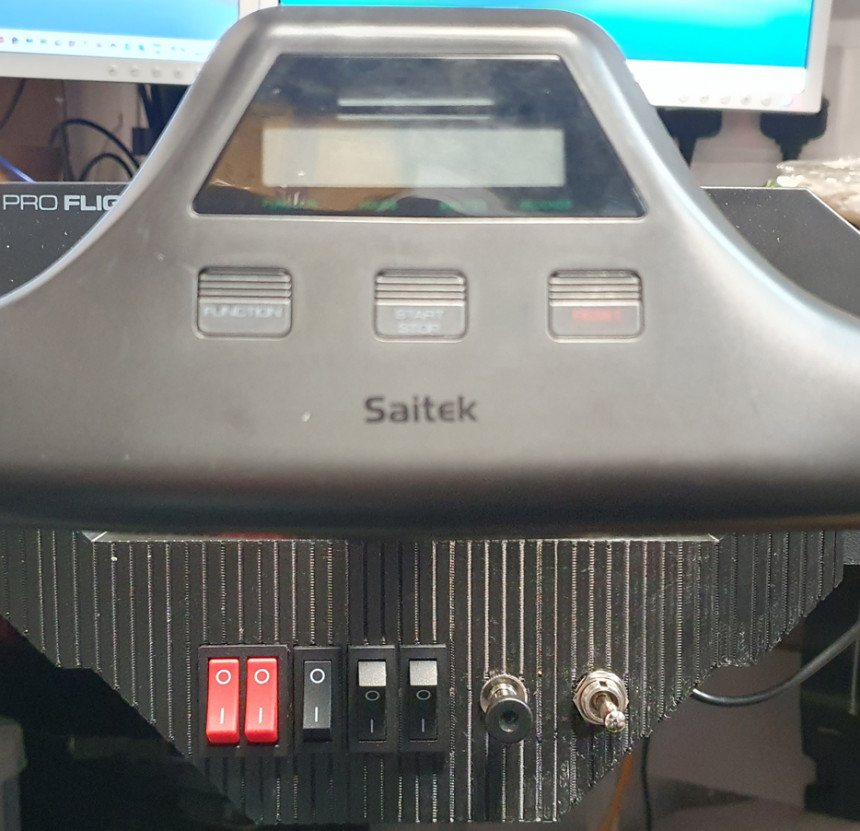
This guide is written for Xplane12 with the Thranda Cessna 208 aircraft and FlyWithLua. Hardware used (so far) is a homemade starter switch panel,Logitech G Saitek yoke & Throttle, and a Yoke clamp with a built-in switch panel (Yoke clamp is available here https://mimics3d.com/product/logitech-saitek-yoke-switch-clamp/).
Now, take a moment to visit the FlyWithLua GitHub page at (https://github.com/X-Friese/FlyWithLua). Click the green button "<> Code" and choose the download.zip option. You'll find comprehensive details about the FlyWithLua project, and download links are contained within the zip file. You can also start with this page https://forums.x-plane.org/index.php?/files/file/82888-flywithlua-ng-next-generation-plus-edition-for-x-plane-12-win-lin-mac/), which will explain the process and lead you to the help pages etc.
Once you have installed FlyWithLua, open your text editor, such as Notepad or Notepad++. Create a new script named 'C208ThrandaSwitches.lua' and, copy the script below, save it into the 'Scripts' folder within the FlyWithLua directory, typically found at 'Xplane12/resources/plugins/FlyWithLua/Scripts'.
*************copy below these astrix lines****************
-- Thranda C208 Switch Script By Mimics 3D Dec 2023
-- ###################################
-- Toggle switch command for on-off switches
-- ###################################
-- Battery On Off
create_switch(3,"sim/cockpit/electrical/battery_on",0,0,1)
-- Ignition
create_switch(12,"thranda/electrical/IgnitionSw",0,0,1)
-- Stby Gen
create_switch(13,"thranda/electrical/StbyGen",0,0,1)
-- Avionics 2
create_switch(14,"thranda/electrical/Avionics2",0,0,1)
-- Avionics 1
create_switch(15,"thranda/electrical/AvionicsBus",0,0,1)
-- Stby Pwr
create_switch(17,"thranda/electrical/AvionicsStbyPwr",0,0,1)
-- Avionics Bus Tie
create_switch(16,"thranda/electrical/BusTieSw",0,0,1)
--Annunciators Test
create_switch(2,"thranda/annunciators/TestButton",0,0,1)
create_switch(1,"thranda/annunciators/FireTest",0,0,1)
-- ###################################
-- Toggle switch command for on-off-on switches
-- ###################################
-- Starter & Motor
-- START
create_positive_edge_flip(11, "thranda/electrical/StarterSw", 0, 0, 1)
-- OFF
create_negative_edge_flip(11, "thranda/electrical/StarterSw", 0, 0, 0)
-- MOTOR
create_positive_edge_flip(10, "thranda/electrical/StarterSw", 0, 0, -1)
-- OFF
create_negative_edge_flip(10, "thranda/electrical/StarterSw", 0, 0, 0)
-- Fuel Boost
-- ON
create_positive_edge_flip(7, "thranda/fuel/FuelPump", 0, 0, 1)
-- NORM
create_negative_edge_flip(7, "thranda/fuel/FuelPump", 0, 0, 0)
-- OFF
create_positive_edge_flip(6, "thranda/fuel/FuelPump", 0, 0, -1)
-- NORM
create_negative_edge_flip(6, "thranda/fuel/FuelPump", 0, 0, 0)
-- Generator
-- RESET
create_positive_edge_flip(9, "thranda/electrical/GeneratorSw", 0, 0, 1)
-- ON
create_negative_edge_flip(9, "thranda/electrical/GeneratorSw", 0, 0, 0)
-- TRIP
create_positive_edge_flip(8, "thranda/electrical/GeneratorSw", 0, 0, -1)
-- ON
create_negative_edge_flip(8, "thranda/electrical/GeneratorSw", 0, 0, 0)
-- External Power GPU
-- START
create_positive_edge_flip(4, "thranda/electrical/ExtPwrGPUSw", 0, 0, 0)
-- OFF
create_negative_edge_flip(4, "thranda/electrical/ExtPwrGPUSw", 0, 0, 1)
-- BUS see note below *
create_switch(5,"sim/cockpit2/electrical/GPU_generator_on",0,0,1)
-- ###################################
-- Rotary Switch see note below **
-- ###################################
Function Rotary_Switch()
if button(18) then
set("thranda/actuators/VoltSelAct",3)
end if
if button(19) then
set("thranda/actuators/VoltSelAct",2)
end if
if button(20) then
set("thranda/actuators/VoltSelAct",1)
end if
if button(21) then
set("thranda/actuators/VoltSelAct",0)
end if
End
do_every_draw ("Rotary_Switch()")
*************copy above these astrix lines****************
* Thranda doesn't have BUS coded, but it is an on-off-on switch, so I still went with the positive edge approach, although I have used a create switch to connect the GPU, which will then cause the Volt meter to show GPU volts and Batt usage drops to zero. At this stage, I'm unsure if Thranda has created two bus bars in their model, but they have coded the Bus Tie switch.
** I have a 4-way rotary switch controlling the Voltammeter Selector Switch. The above methods work only if you turn the rotary switch slowly, which, of course, we won't! So I'm using a function triggered by the rotary switch to write directly to the dataref
Cost on frame rate, currently 1.67fps Nothing in the grand scheme of things. Switch numbering and selection are described further down within the hardware description.
Here's a brief explanation of the code for an ON-OFF switch:
- `create_switch(3, "sim/cockpit/electrical/battery_on", 0, 0, 1)`:
The number 3 refers to the switch's allocation on the interface, recognised as 'Btn 3' by X-Plane - on my set-up. The string is the DataRef in X-Plane you're controlling, and the last three numbers represent an array (usually zero if you don't have an array), the 'off' state, and the 'on' state, respectively.
For an ON-OFF-ON switch, you use the positive and negative edges commands. This approach accounts for the dual nature of the switch, where one part sends an 'on' signal and the other an 'off'. Use specific data values like 1, 0, and -1, understanding the neutral position is typically zero. The provided code accommodates these variations and ensures accurate control. On the switch panel, some of the switches show off when the switch is actually on. For example, the Fuel Boost shows as off when the switch is toggled to the fully down position. In the code, this sends a -1, not a 0, but the Thranda coding knows that this -1 means the Fuel Boost is off, and a 0 means the pump is on - confusing at first!
For additional modifications or to explore different functionalities, visit [DataRefTool](https://datareftool.com/) to understand which datarefs are being accessed and how to manipulate them further using on-screen buttons to observe changes in the tool."
HARDWARE AND ASSIGNMENT
The switch box above is a DIY project using the Leo Bodnar BU0836A 12-bit joystick interface coupled with a BU0836A Breakout Matrix board - More info on the BU0836A is here https://www.leobodnar.com/shop/index.php?main_page=product_info&products_id=204 . Leo Bodnar board offers a simple solution for creating custom hardware. The break-out Matrix board makes connecting switches as easy as point-to-point wiring, no diodes, no crossed ground wires https://www.leobodnar.com/shop/index.php?main_page=product_info&products_id=274 . Connect the switches to the board and link it to your computer via USB. It will be recognised as a BU0836A Interface in Windows. Search "setup USB game controllers" or run 'joy.cpl' in Windows 11 to ensure it is all connected. Note the numbers assigned to the switches in Windows don't correspond to the numbers allocated by Xplane!
After assembling, you'll need to identify which switches correspond to which numbers in the system. This is crucial as your configuration will most likely differ from mine, so you need to edit the code for the switch numbers to match your switch box. Launch X-Plane, head to the hardware configuration area (accessible via the three sliders at the top right in flight mode), select the BU0836A and begin testing each switch. Note the number that lights up for each switch, ensuring they are set to 'Do Nothing' as the LUA script will handle the rest. - you type "Do nothing" and apply or select any of the menu options headings and apply IE: +ATC or -ATC if the list is expanded.
Xplane numbers the switches from 0 onwards across the different hardware controls. So switch box one with twenty switches will be seen as 0 to 19. Yoke Switch box with eight switches will be seen as 20 to 27, and so on.
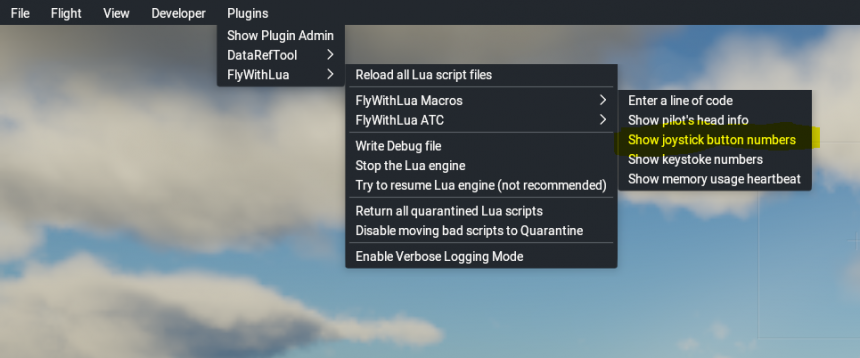
To find what each switch is called, use the FlyWithLua Maco "show joystick button numbers," as shown in the picture above. Once you have all the hardware plugged in, it's a case of firing every switch and recording its number.
HARDWARE IDENTIFIERS
I'm not using Lua script to control the Logitech G Saitek hardware. Instead, I have let Xplane handle these devices as they have been coded into Xplane. As I expand on this project, I will be looking to replace the Yoke and Throttle with my own design, but that is a blog for another day.
When it comes to multiple external hardware control devices, it's worth reading the Xplane Customer Support pages for a better understanding of how they deal with flight controls and those that are using two identical units. https://www.x-plane.com/kb/using-two-copies-joystick/
Xplane will add the Unique Identifier (UID) number supplied by Windows and the USB port it is plugged into. The UID is created by the PID & VID supplied by the hardware controller. The short version is a unique number that gets created and might change if you add stuff or swap it about.
Considering this, it's advisable to label your cables or connect them using a USB hub to track their positions. Should you integrate a second Leo Bodnar switch box, be aware that Windows or X-Plane might alter the device order, necessitating adjustments to all your switch configurations in the script. Mimics3D switch units provide a published PID (Product ID) and VID (Vendor ID) list for their devices. If you plan to purchase multiple units simultaneously, each will possess a unique identifier. However, if you're buying additional units over time, inform them of the units you already own so they can ensure the new equipment is properly configured to complement your existing setup.
My Yoke Switch has the pull-on push-off switch assigned to button 645, which I'm using for the parking brake. The other switches are currently being used for datarefs testing. The code for the parking brake is "create_switch(645,"sim/flightmodel/controls/parkbrake",0,0,1)." It's important to note that the parking brake can actually be controlled in small increments, such as 0.1, 0.2, 0.3, up to 1.0. While you could use a data ref table for this, for my purposes, a simple on or off is more than sufficient.
My switch box features a button on the side designated for the Governor Speed Test. The relevant data ref triggers a command, "sim/systems/overspeed_test," which doesn't involve altering any value. Due to a mistake on my part, I purchased an (off)-on switch, which resulted in it being in the "on" position by default. Originally, my intention was to map this function directly through X-Plane for simplicity. However, X-Plane lacks the "on-release" action setting found in other simulators. As a workaround, I added some code within the rotary function. I might change the name of the function to AwkwardStuff().
Function Rotary_Switch()
if button(18) ...all the code as above, plus
-- not the rotary switch
if not button(0) then
command_once("sim/systems/overspeed_test")
end
End
do_every_draw ("Rotary_Switch()")
The 'if not' condition addresses the issue of the switch being permanently on, triggering the command when the button is released. While I plan to replace the switch at a later time, this code snippet serves as a useful example of invoking a command dataref and applying the 'if not' logic.
To be continued....
Difference Training GA8tc G-HTFU
UK Difference training - EFIS, Turbocharger, and Constant Speed Propeller. Version 2.7 Ju...


