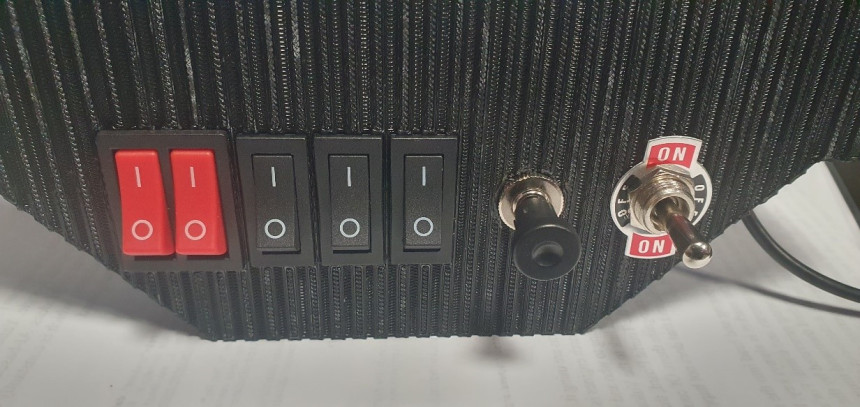

Mimics3D Switch Yoke Hack
The versatile switch yoke from Mimics3D can be upgraded to handle an additional five switches. The PCB version includes switches SW9 to SW13, which are already tracked on the board. To enable them, you only need to modify the STM32 programming.
The board uses FreeJoy, a highly flexible and user-friendly piece of software for home joystick production. You can find more information and downloads at the FreeJoy Wiki: https://github.com/FreeJoy-Team/FreeJoy
Since the STM32 board is already programmed with FreeJoy, you just need to download the FreeJoyQT program from their releases page: https://github.com/FreeJoy-Team/FreeJoyConfiguratorQt/releases
You can choose between the portable version or an installable version for Windows.
Configuring the Switches
- Install and launch FreeJoyQT.
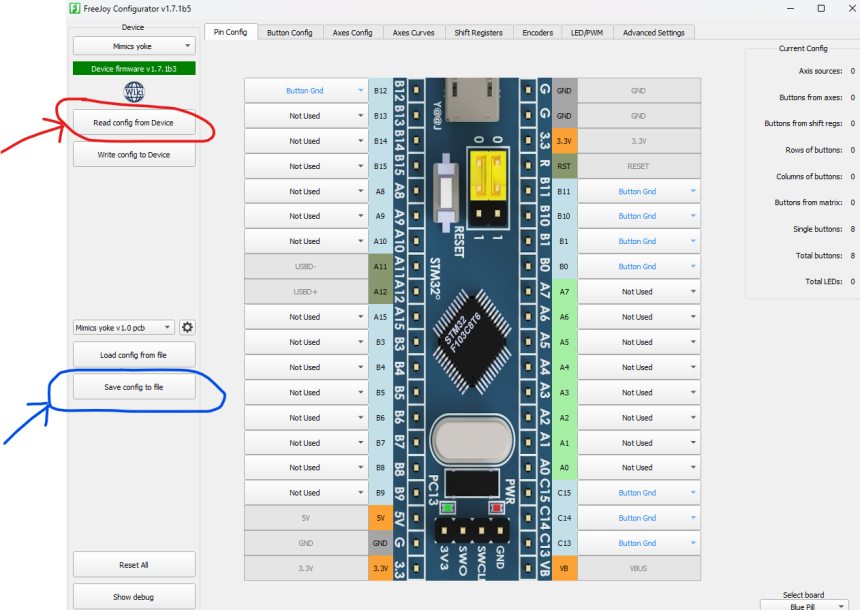
- Plug in the yoke; the software should detect the device.
- Click the Read Config button (red arrow in the image below) to load the existing configuration.
- Save the original configuration using the Save Config to File button (blue arrow).
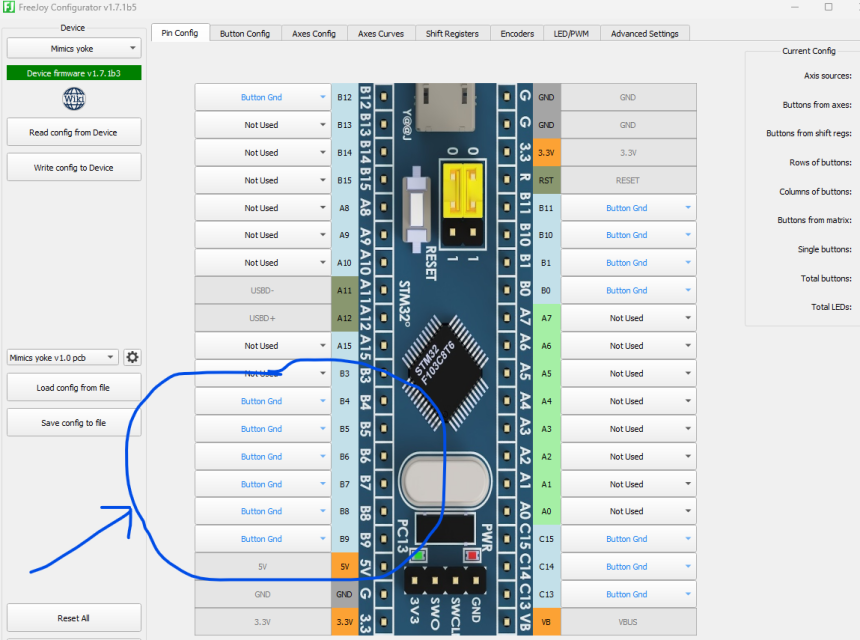
- To configure SW9 to SW13, change the dropdown options to Button GND from B5 to B9 (see the image below).
- Navigate to the Button Config tab—you should see 14 physical buttons instead of the original eight.
Wiring and Soldering
To use the additional switches, you'll need some careful soldering:
- On the yoke clamp, a recessed area with a 2mm thick wall rilled through. This leads to an open channel, which can easily accommodate a 5mm 6-core cable.
- You could desolder and remove the entire board, which risks damage. Instead, top soldering the wires is an easier and safer option.
- Use a cable tie around the cable for strain relief.
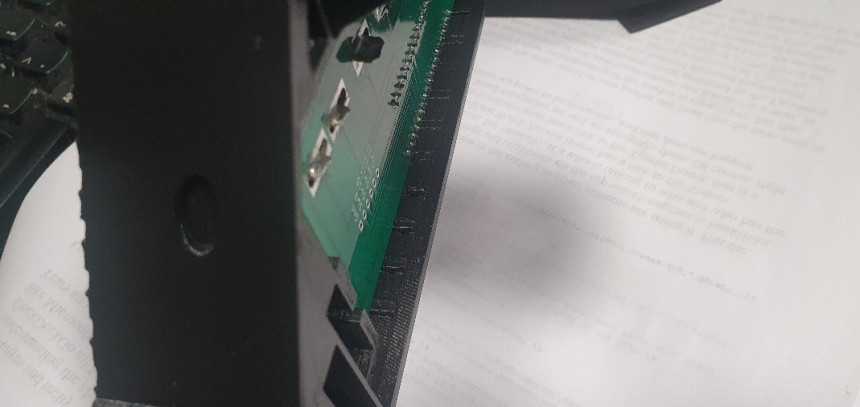
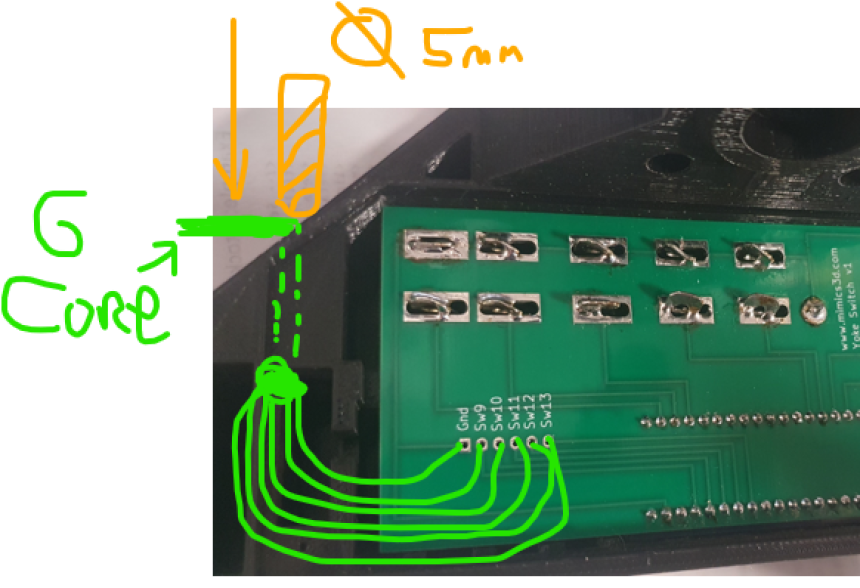
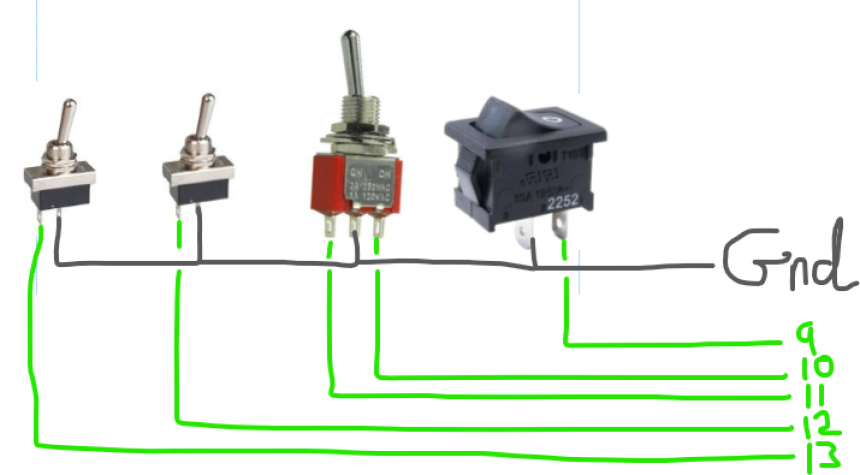
- Wiring is straightforward: each switch connects to a ground wire.
- The simple wiring diagram below illustrates one possible setup.
Mapping the Switches in FreeJoy Configurator
Once your switches are connected, you need to map them in FreeJoy Configurator:
- Open FreeJoy Configurator and go to the Button Config tab.
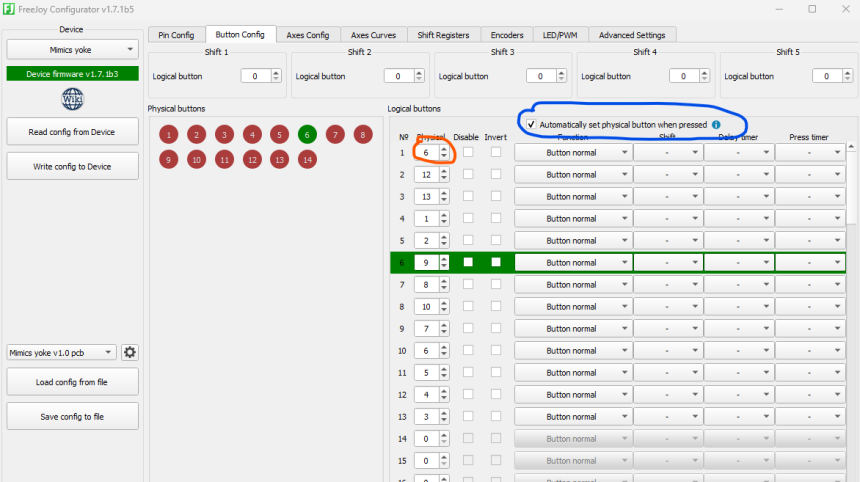
- Ensure that "Automatically set physical button when pressed" is ticked.
- Click inside the first button field (orange circle in the image below).
- Toggle the first red rocker switch on the yoke. A number will be assigned, and another field may highlight in green—ignore these details for now.
- Repeat this process for each switch:
- Click the next box.
- Toggle the next switch.
- Work through all switches systematically.
- If things start looking confusing, click Write Config to Device at any time.
- Turn off all switches and start fresh from the next switch.
- Continue until all switches are mapped.
- The toggle switch at the end of the yoke is non-latching, so it will turn off automatically, but it will still be assigned a button number.
- Once all switches are assigned, click Write Config to Device again to save the settings.
Testing in Windows
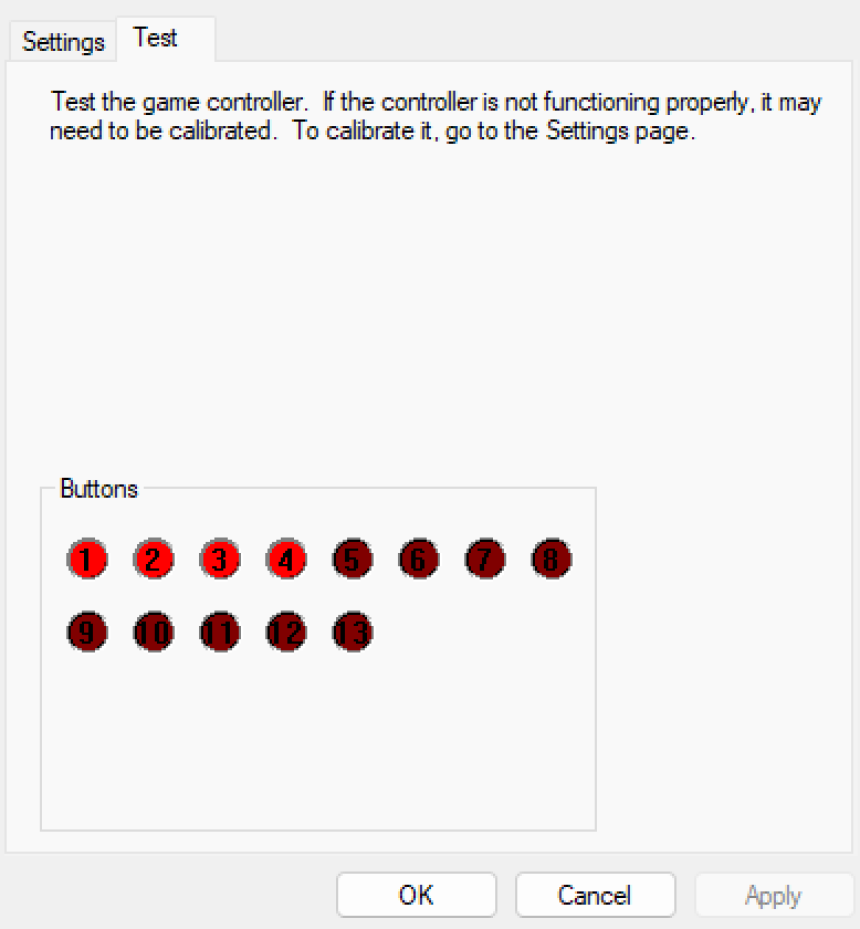
You can now verify your button assignments using Windows' built-in game controller test:
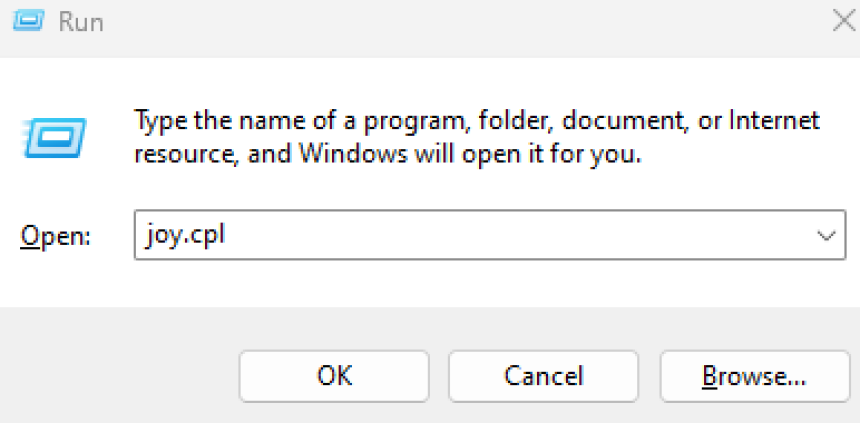
- Open the Run dialogue (Win + R), type joy.cpl, and press Enter.
- Select your device and open Properties.
- Test all buttons and switches to ensure Windows recognises them correctly.
Final Notes
- Enjoy building and expanding your control panel!
- Be aware that this mod may void your warranty.
- If you accidentally misconfigure the STM32, don't worry—simply reset the Button GND dropdown settings as shown earlier and reflash the config.
- The button numbering may not be sequential, but this does not affect performance—you can customise button mapping in your simulator software as needed.


Shutting down the aircraft engine
Why we cut the fuel and do a dead-cut test of the avgas aircraft engine.
GA8tc Airvan G-HTFU CofG
Active Excel spreadsheet to calculate the CofG for G-HTFU
The Evolution of the Standard Overhead Join at UK GA Airfields
The overhead join has long been a staple in the United Kingdom's general aviation (GA) com...